
Créez votre premier site de documentation
Dans ce tutoriel, vous publiez un site de documentation à partir d’un dépôt GitHub et modifiez une page de celui-ci. Vous n’avez aucune expérience en programmation à avoir et rien à installer : chaque étape se déroule dans un navigateur.
Ce que vous aurez à la fin : un site de documentation en ligne à l’adresse docsbook.io/YOUR-USERNAME/docs, ainsi qu’une page que vous aurez modifiée vous-même.
Avant de commencer#
Vous avez besoin de deux choses :
- Un navigateur et une connexion Internet. Tous les systèmes d’exploitation fonctionnent.
- Un compte GitHub. Il est gratuit. L’étape 1 vous permet d’en créer un si vous n’en avez pas.
Qu’est-ce que GitHub ? GitHub est un site web où les utilisateurs stockent et partagent des fichiers texte. Imaginez Google Drive, conçu pour la documentation et le code. Docsbook lit vos fichiers depuis GitHub et les publie sous forme de site web de documentation.
Étape 1 : créer un compte GitHub#
Ignorez cette étape si vous avez déjà un compte.
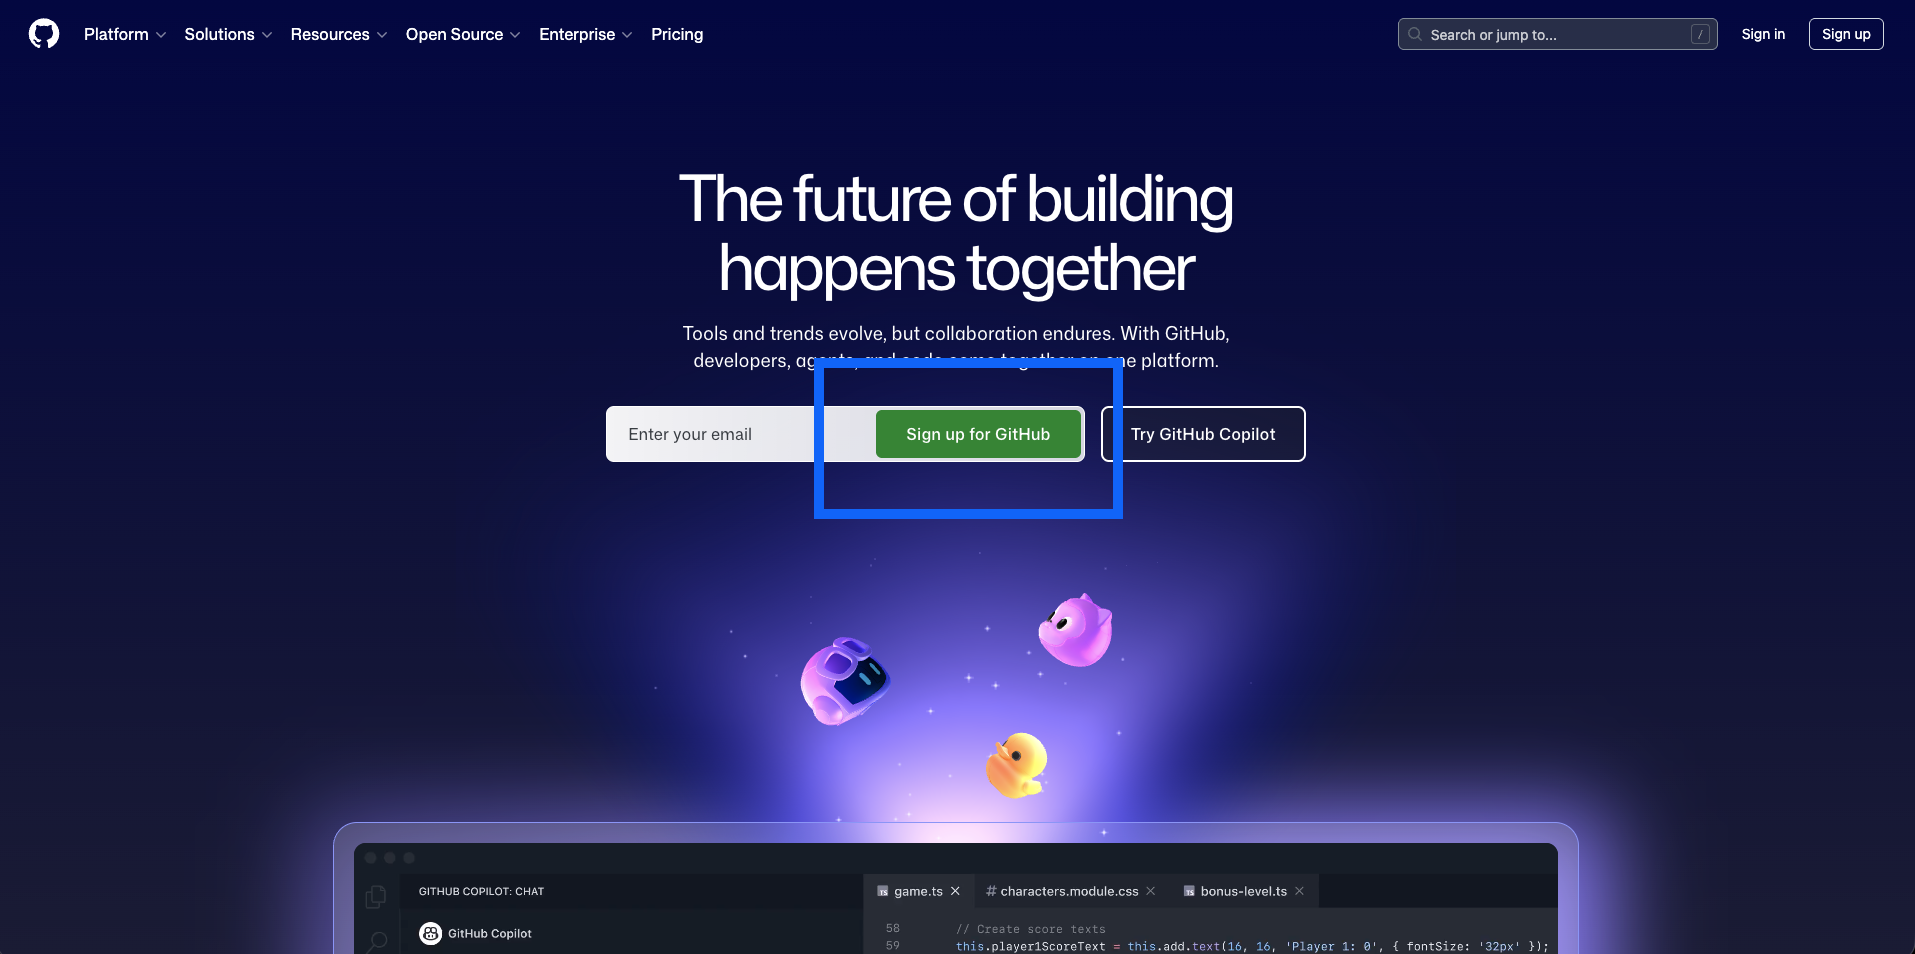
- Accédez à github.com.
- Cliquez sur Sign up dans l’angle supérieur droit.
- Saisissez votre adresse e-mail et choisissez un mot de passe.
- Choisissez un nom d’utilisateur. Il apparaît dans l’URL de votre documentation, comme dans
docsbook.io/your-username/your-repo. - Confirmez le code de vérification que GitHub vous envoie par e-mail.
Étape 2 : dupliquer le dépôt d’exemple#
Un dépôt — ou « repo » en abrégé — est un dossier sur GitHub qui contient vos fichiers de documentation. Un dépôt publie un site de documentation.
Plutôt que de partir d’un dépôt vide, copiez le dépôt d’exemple de Docsbook. Copier le dépôt de quelqu’un d’autre s’appelle le fork, et votre copie est indépendante : vos modifications n’affectent jamais l’original.
-
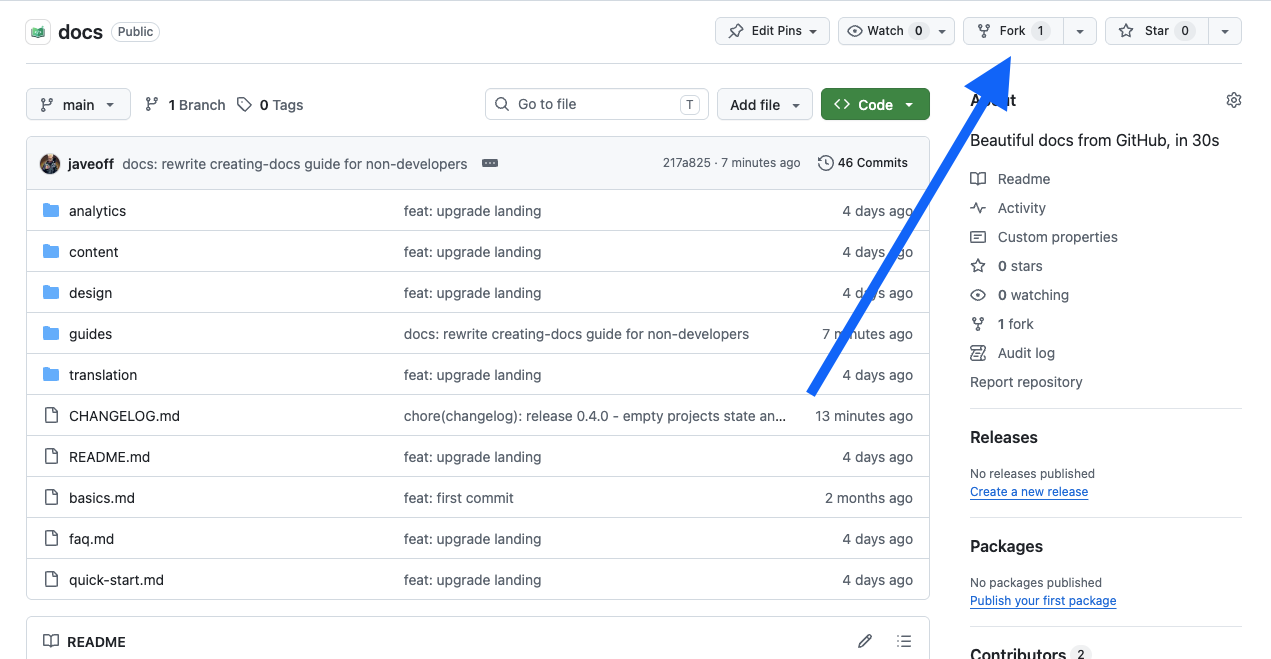
Accédez à github.com/docsbook-io/docs.
-
Cliquez sur Fork dans le coin supérieur droit.
-
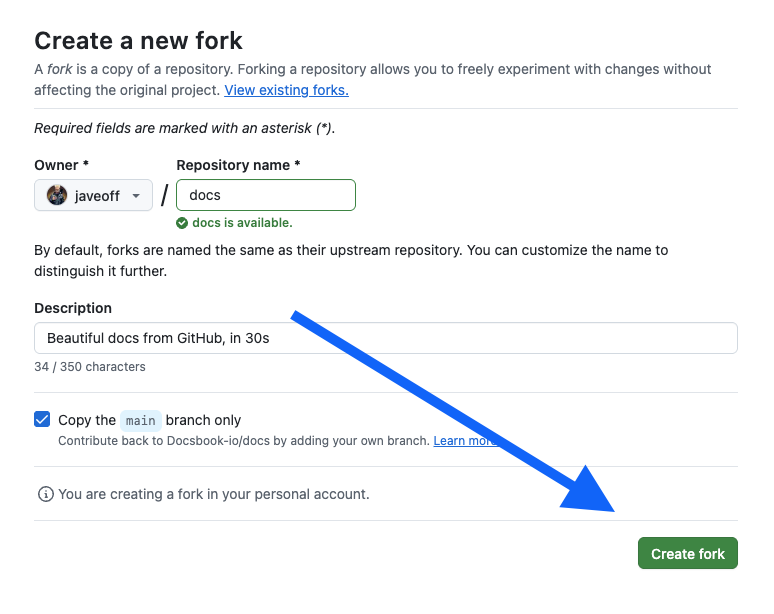
Laissez tous les paramètres tels quels et cliquez sur Create fork.
-
GitHub ouvre votre nouveau dépôt à l’adresse
github.com/YOUR-USERNAME/docs.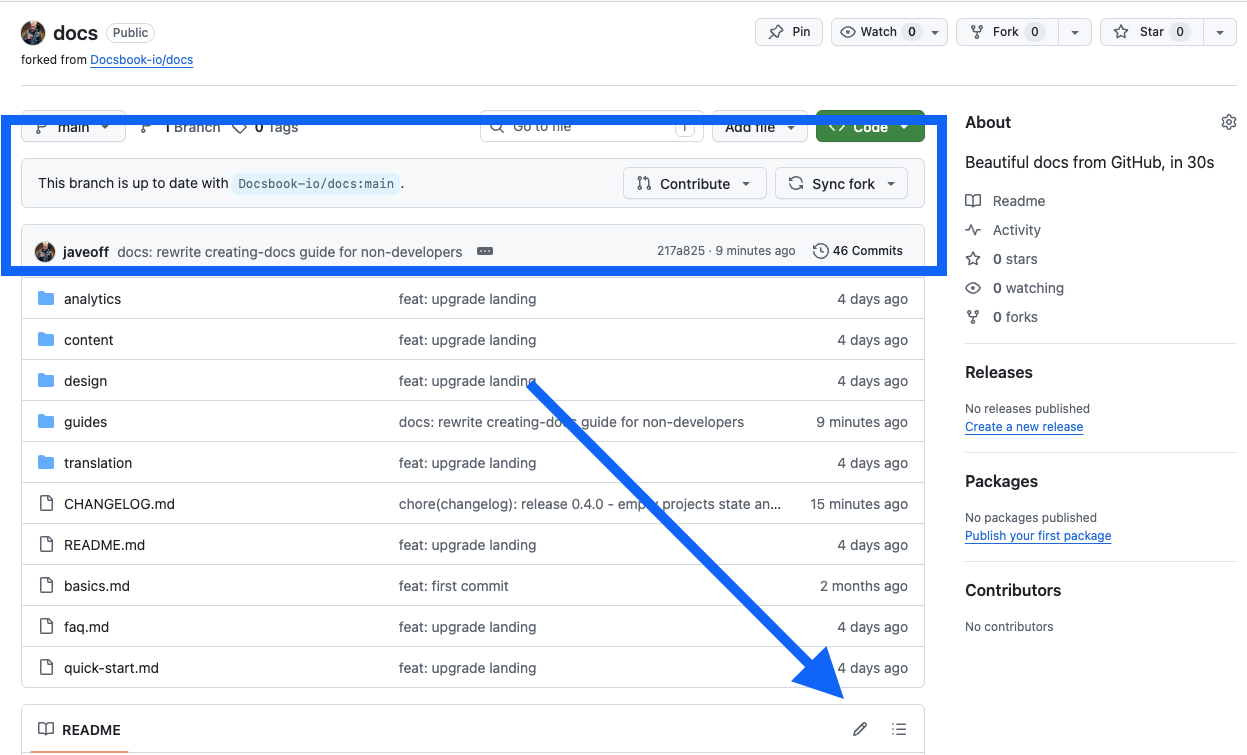
Vous disposez maintenant d’un dépôt contenant une documentation d’exemple, prêt à être publié.
Étape 3 : connecter le dépôt à Docsbook#
-
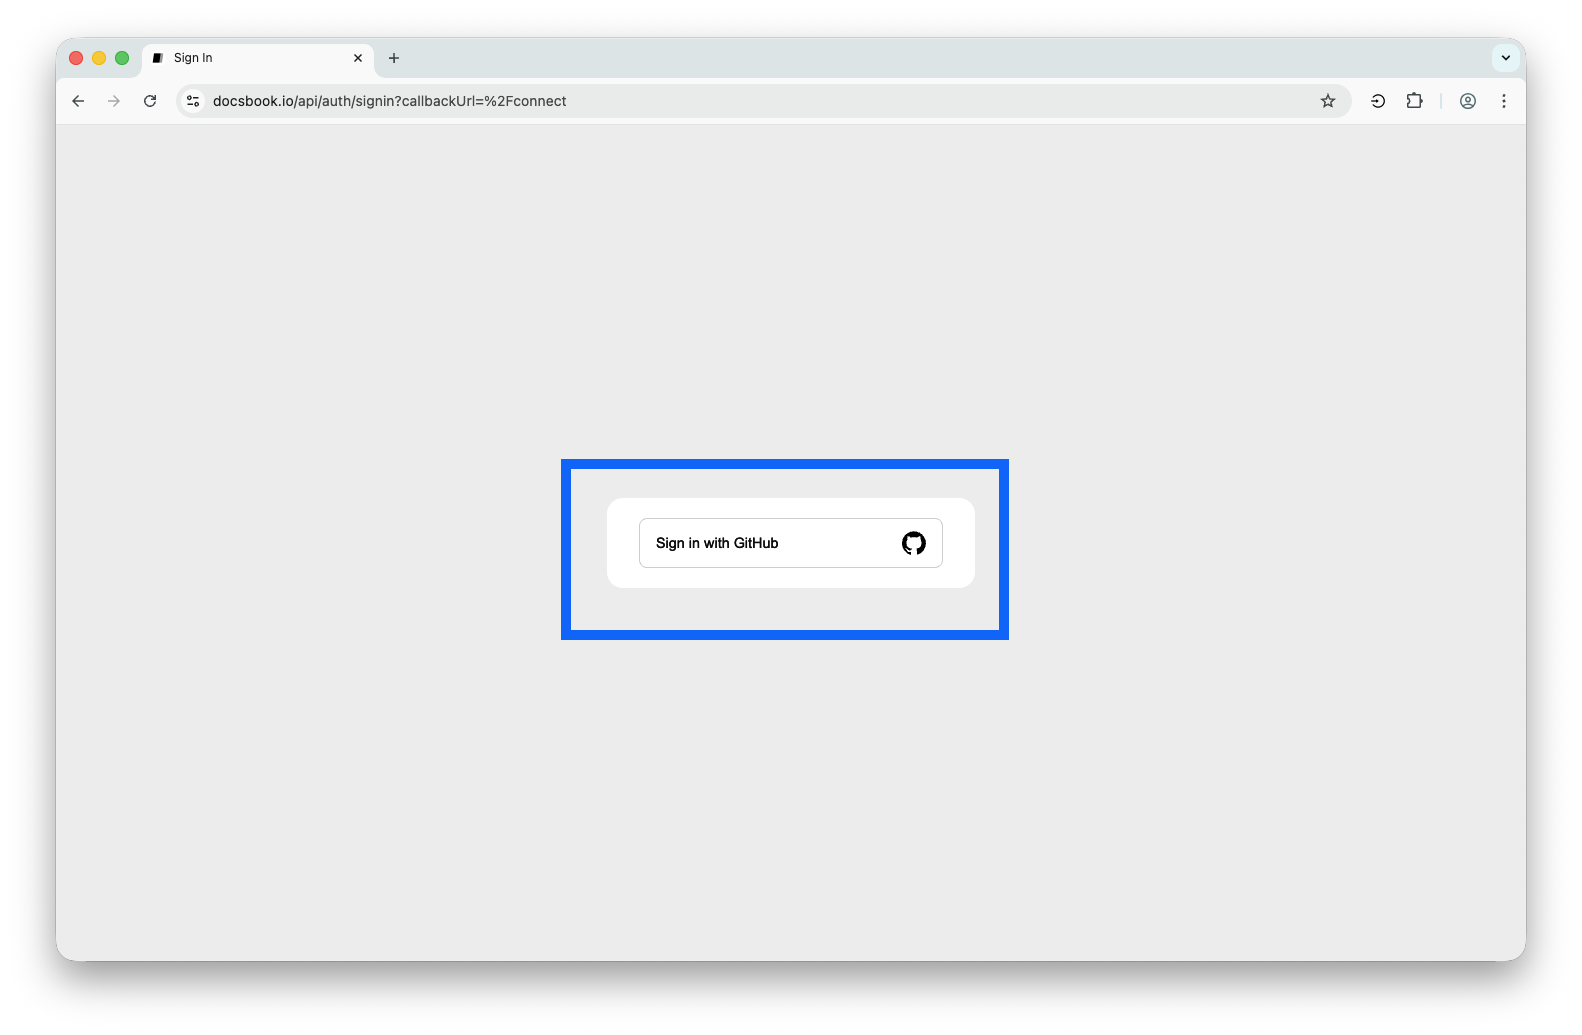
Rendez-vous sur docsbook.io/connect.
-
Choisissez une méthode de connexion — GitHub, Google, Apple ou un code à usage unique envoyé par e-mail — et terminez la procédure.
-
Si vous vous êtes connecté avec Google, Apple ou par e-mail, Docsbook vous demande l’accès à GitHub. Cliquez sur Autoriser docsbook.
Docsbook lit les fichiers de votre dépôt. Il ne peut rien modifier ni supprimer dans votre dépôt, sauf si vous le lui demandez.
-
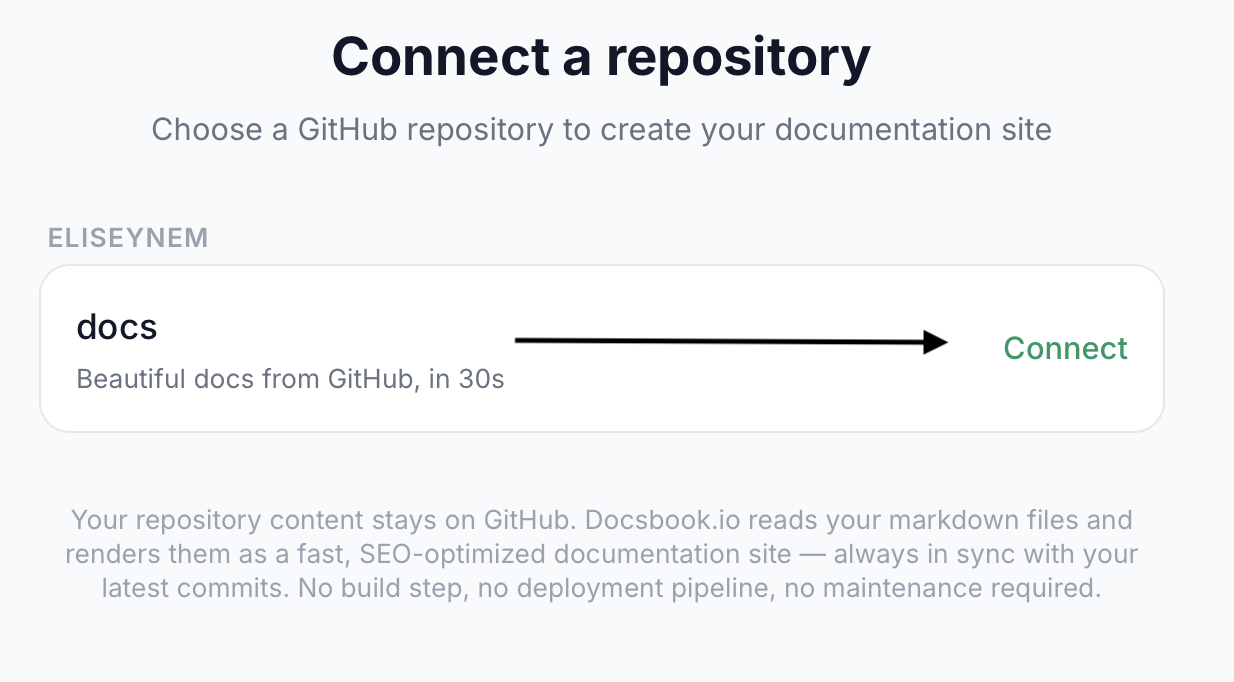
Repérez dans la liste le dépôt que vous avez forké et cliquez dessus.
-
Docsbook crée votre site et vous y redirige.
Votre documentation est maintenant disponible à l’adresse suivante :
docsbook.io/YOUR-GITHUB-USERNAME/docsOuvrez-la et cliquez sur les éléments de la barre latérale. Chaque page que vous voyez est un fichier Markdown du dépôt que vous avez forké.
Étape 4 : modifier une page sur GitHub#
-
Ouvrez votre dépôt à l’adresse
github.com/YOUR-USERNAME/docs. -
Cliquez sur le fichier que vous souhaitez modifier — commencez par
README.md.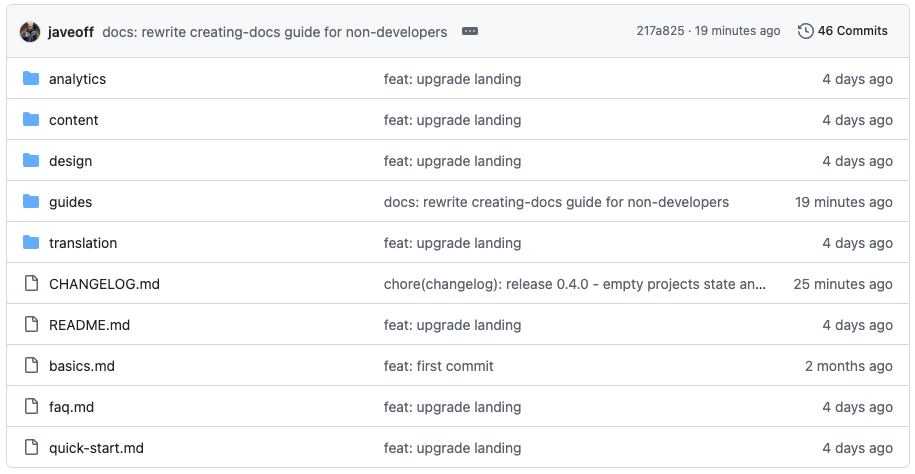
-
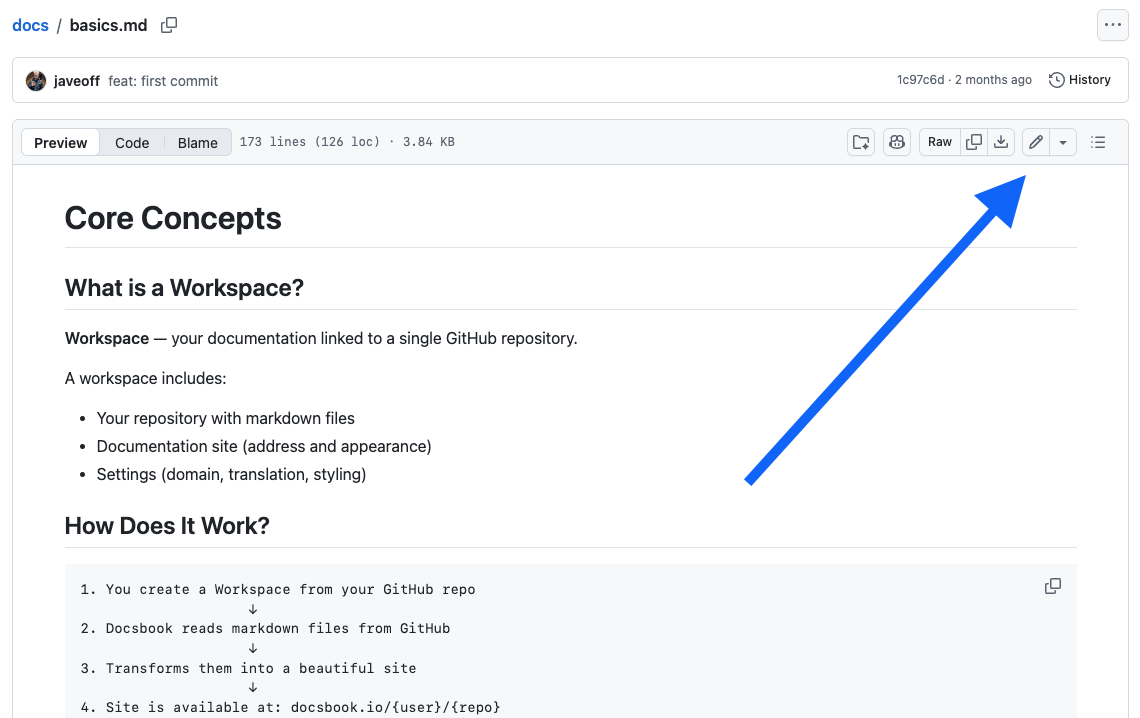
Cliquez sur l’icône en forme de crayon vers le coin supérieur droit du fichier.
-
Modifiez une phrase. Le fichier est écrit en Markdown :
**bold**s’affiche en gras,# Headings’affiche comme un grand titre. La référence de la syntaxe Markdown à la fin de cette page couvre le reste.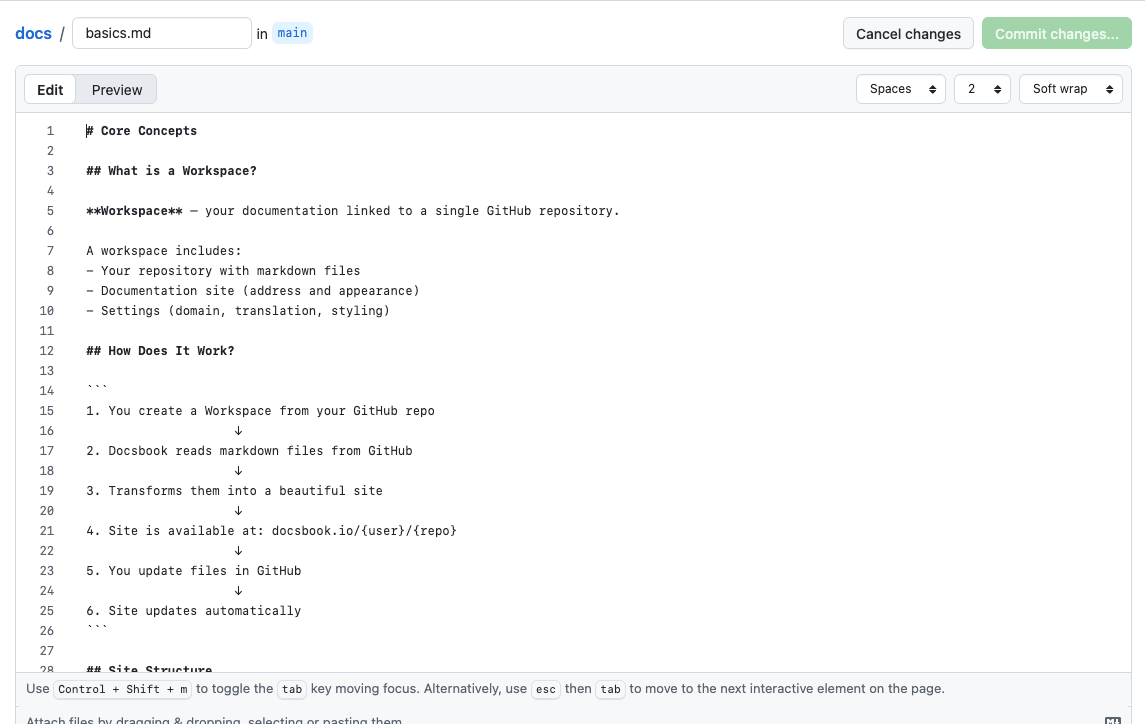
-
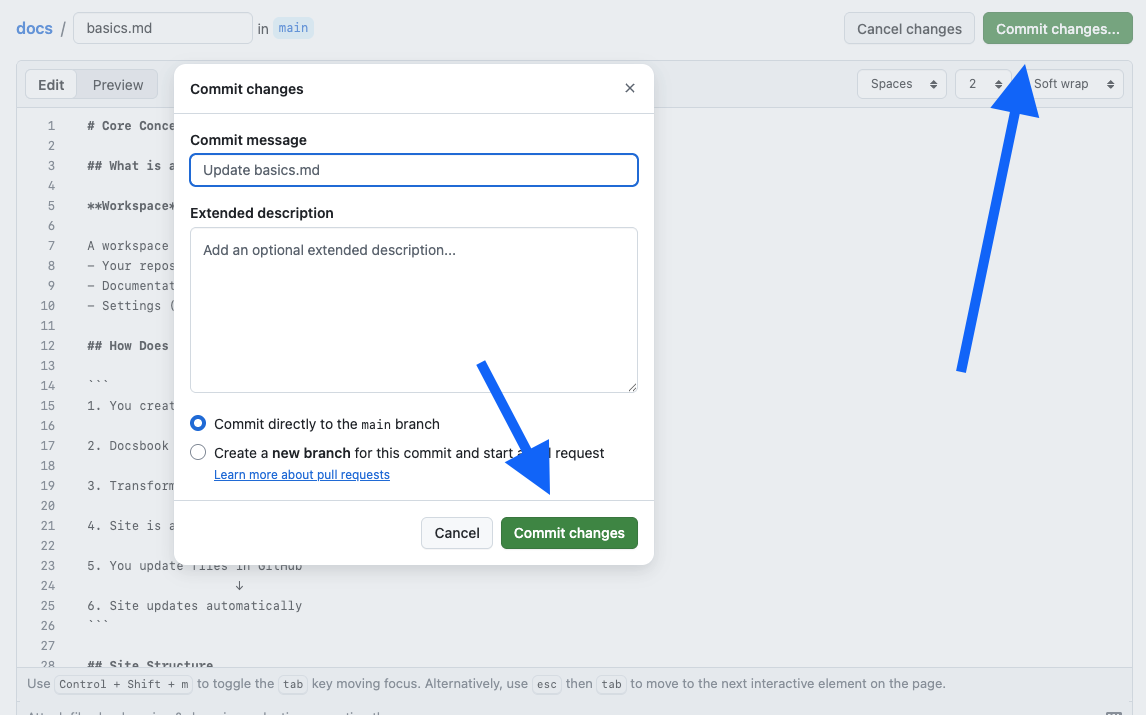
Faites défiler la page jusqu’à Valider les modifications.
-
Rédigez une courte note décrivant ce que vous avez modifié, par exemple « Mettre à jour l’introduction ».
-
Cliquez sur Valider les modifications.
Étape 5 : voir le changement sur votre site#
Retournez sur votre site Docsbook et rechargez la page que vous avez modifiée. Votre nouvelle phrase s’y trouve.
C’est toute la boucle : validez vos modifications sur GitHub, et le site publié se met à jour. Vous avez terminé le tutoriel.
Ajouter et supprimer des pages#
Ajouter une page suit le même processus, avec un bouton différent.
Ajouter une page :
-
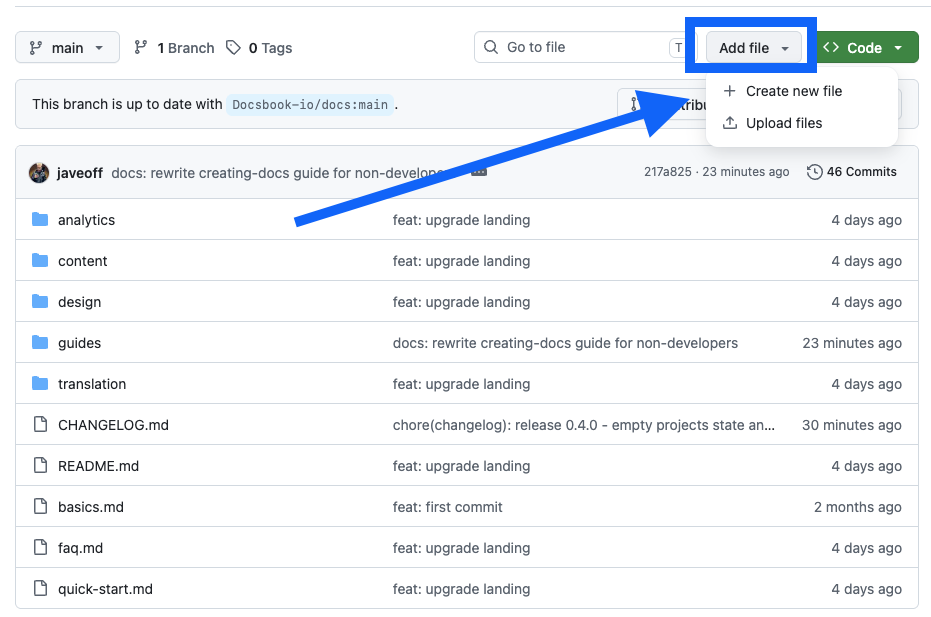
Ouvrez votre dépôt et cliquez sur Add file → Create new file.
-
Dans Name your file, saisissez le chemin et le nom du fichier, par exemple
guides/installation.md. Saisir un/crée le dossier.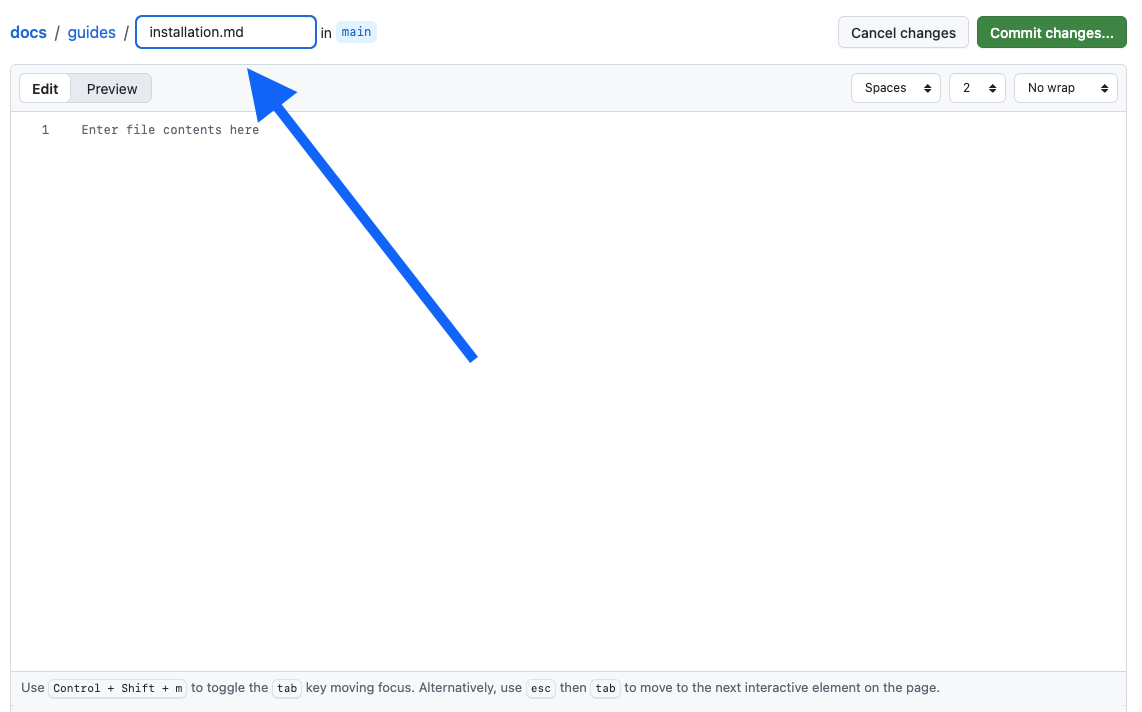
-
Rédigez le contenu et cliquez sur Commit new file.
La page apparaît automatiquement dans la barre latérale de votre Docsbook.
Supprimer une page :
-
Ouvrez le fichier dans votre dépôt.
-
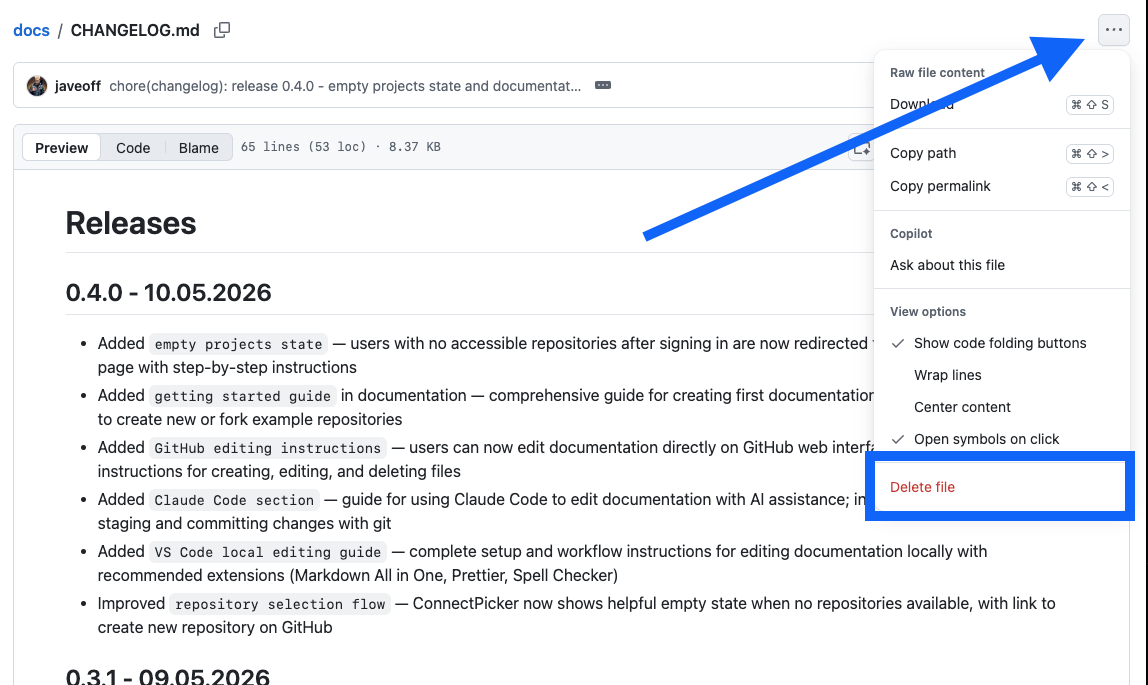
Cliquez sur le menu ⋯ situé en haut à droite.
-
Cliquez sur Delete file, puis sur Commit changes.
Autres façons de procéder#
Le tutoriel ci-dessus utilise la méthode qui fonctionne sans rien installer. Trois alternatives existent une fois que vous avez dépassé le premier site.
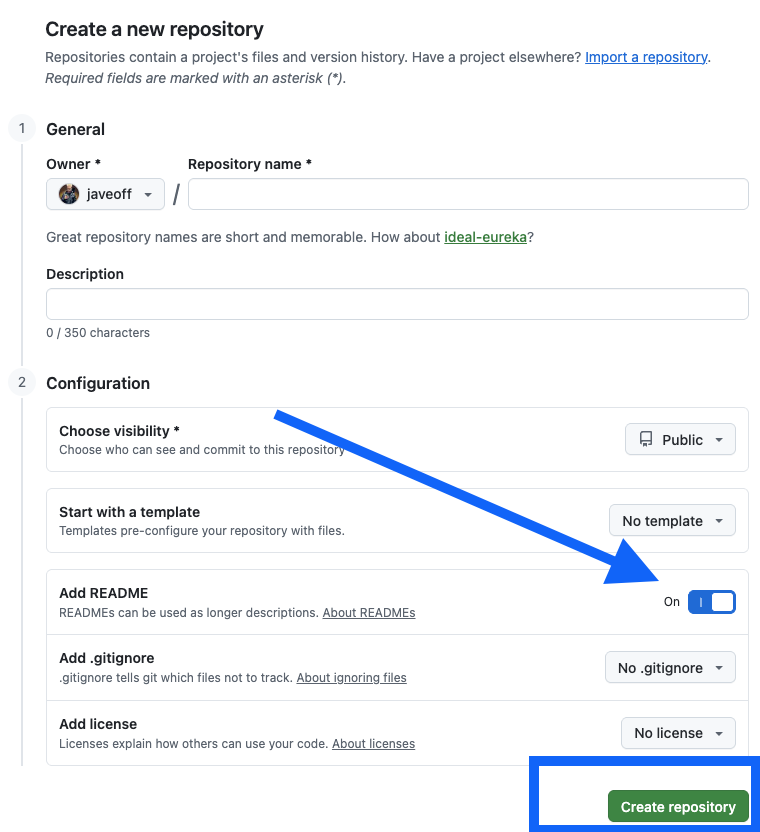
Commencer à partir d’un dépôt vide plutôt que de le forker. Accédez à github.com/new, donnez au dépôt un nom court sans espaces, sélectionnez Public, cochez Add a README file, puis cliquez sur Create repository. Ensuite, connectez-le exactement comme à l’étape 3.
Écrire des pages avec un assistant de programmation IA. Claude Code lit, crée et modifie des fichiers par le biais d’une conversation, ce qui est plus rapide lorsque vous produisez plusieurs pages à la fois. Installez-le depuis claude.ai/code, demandez-lui de cloner votre dépôt, puis décrivez ce que vous voulez — "create guides/installation.md with sections for requirements, installation and first login". Lorsque vous avez terminé, demandez-lui de valider et d’envoyer les modifications, et votre site est mis à jour.
Modifier directement la page publiée. Une fois votre site connecté, vous pouvez modifier un bloc depuis la page que vous consultez, dans le chat Docsbook AI, sans GitHub ni installation. Consultez la modification sur la page en ligne.
Référence : syntaxe Markdown#
Markdown est un ensemble de symboles qui contrôlent la mise en forme. Voici ceux utilisés par la documentation.
Texte#
| Ce que vous saisissez | Résultat affiché |
|---|---|
**bold text** |
texte en gras |
*italic text* |
texte en italique |
~~strikethrough~~ |
|
`inline code` |
inline code |
Titres, listes et liens#
# Large heading (page title)
## Medium heading (section)
### Small heading (sub-section)

- First item
- Second item
  - Nested item, indented by two spaces

1. First step
2. Second step

[Link to an external site](https://example.com)
[Link to another page in your docs](/docsbook-io/docs/guides/getting-started/managing-docs)
Images et blocs de code#
Délimitez un bloc de code avec trois accents graves et indiquez le langage afin qu’il bénéficie de la coloration syntaxique :
```javascript
console.log("Hello!")
```Encadrés#
> This is a note or an important callout.Référence : comment vos fichiers deviennent des pages#
Docsbook construit la barre latérale à partir des noms de vos fichiers et dossiers. Il n’y a rien à configurer.
| Fichier dans votre dépôt | Page dans la barre latérale |
|---|---|
README.md |
Accueil |
installation.md |
Installation |
guides/quick-start.md |
Guides → Démarrage rapide |
api/overview.md |
Api → Vue d’ensemble |
Trois règles en découlent :
- Les noms de fichiers et de dossiers deviennent des titres de page, les traits d’union étant remplacés par des espaces.
README.mddans un dossier devient la page d’index de ce dossier.- Les noms en minuscules contenant des traits d’union produisent des URL lisibles :
getting-started.mddevient/getting-started.
Pour savoir ce qui détermine l’ordre de ces pages, consultez Gérer votre site de documentation.
Étapes suivantes#
- Gérer votre site de documentation — mettez à jour le contenu, contrôlez l’accès et corrigez un site qui ne s’est pas actualisé.
- Configurer un domaine personnalisé — servez la documentation depuis
docs.yourcompany.com. - Activer la recherche en texte intégral — permettez aux lecteurs de trouver une page par mot-clé.