
Create your first documentation site
What you will have at the end: a live documentation site at docsbook.io/YOUR-USERNAME/docs, and one page on it that you edited yourself.
Before you start#
You need two things:
- A browser and an internet connection. Any operating system works.
- A GitHub account. It is free. Step 1 creates one if you do not have one.
What is GitHub? GitHub is a website where people store and share text files. Think of Google Drive, built for documentation and code. Docsbook reads your files from GitHub and publishes them as a documentation website.
Step 1: create a GitHub account#
Skip this step if you already have an account.
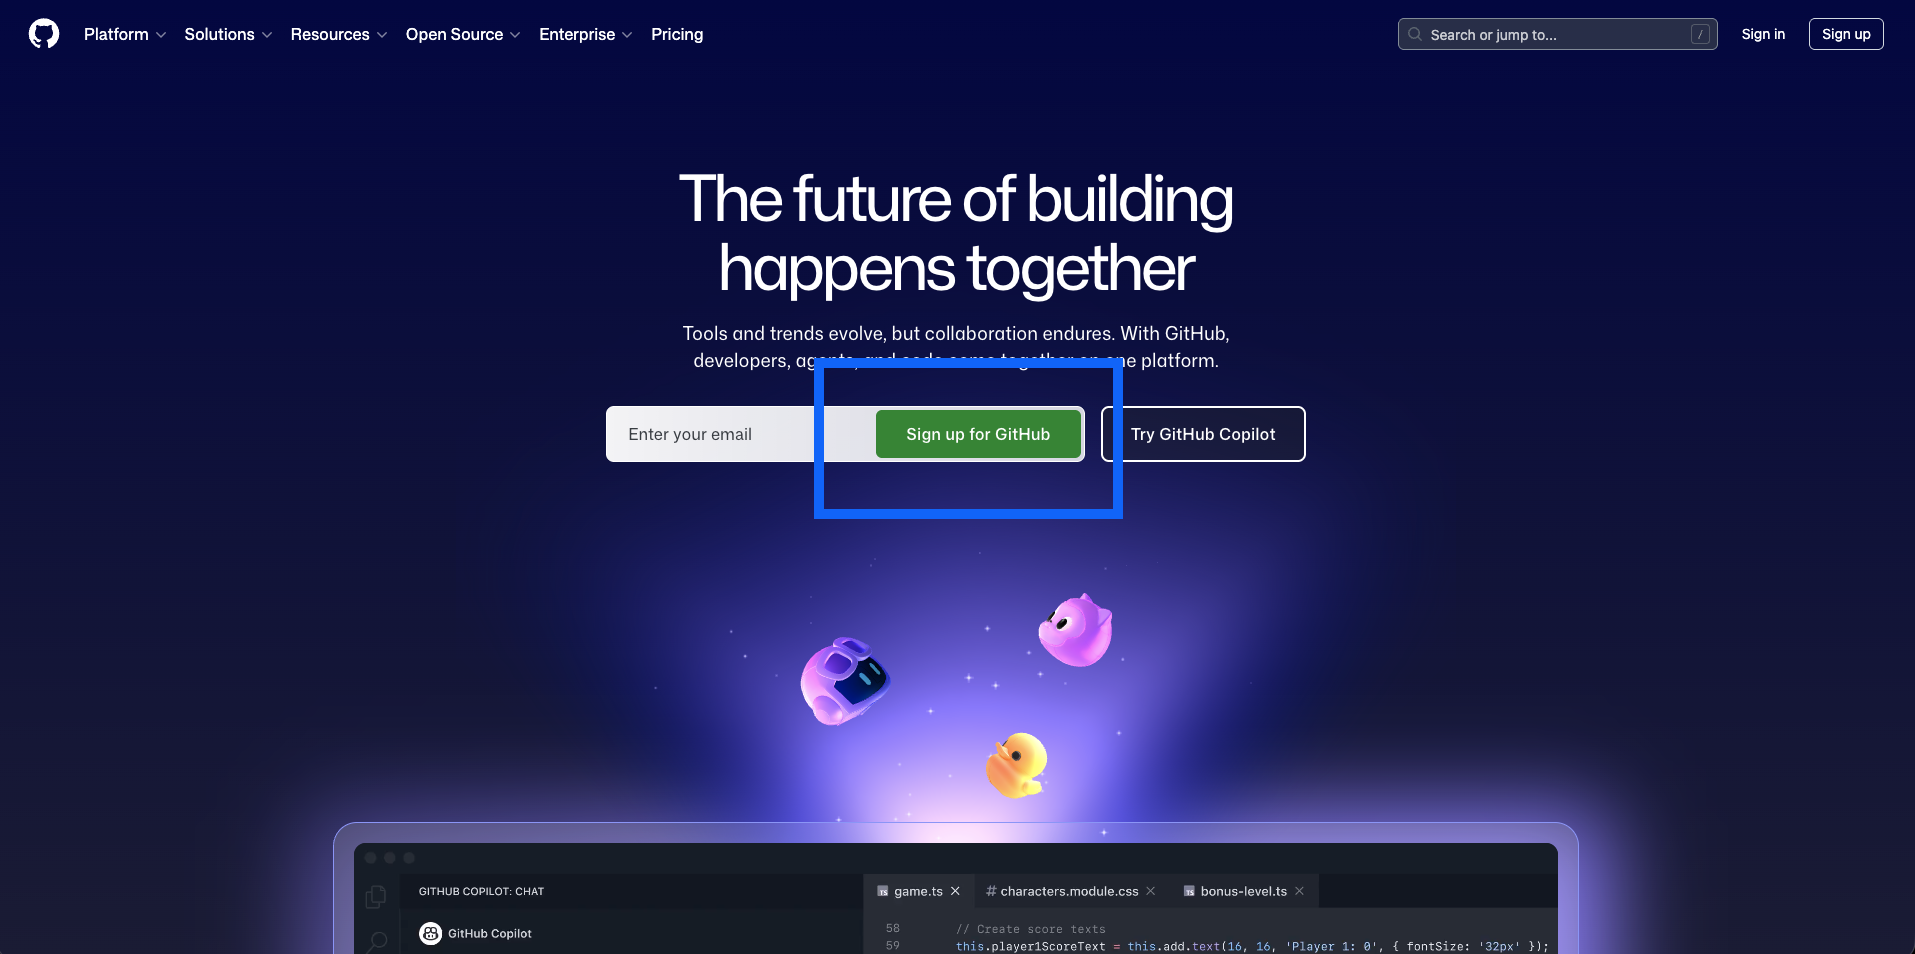
- Go to github.com.
- Click Sign up in the top-right corner.
- Enter your email address and choose a password.
- Choose a username. It appears in your documentation URL, as in
docsbook.io/your-username/your-repo. - Confirm the verification code GitHub emails you.
Step 2: fork the example repository#
A repository — "repo" for short — is a folder on GitHub that holds your documentation files. One repository publishes one documentation site.
Rather than starting from an empty one, copy the Docsbook example repository. Copying someone else's repository is called forking, and your copy is independent: what you change never affects the original.
-
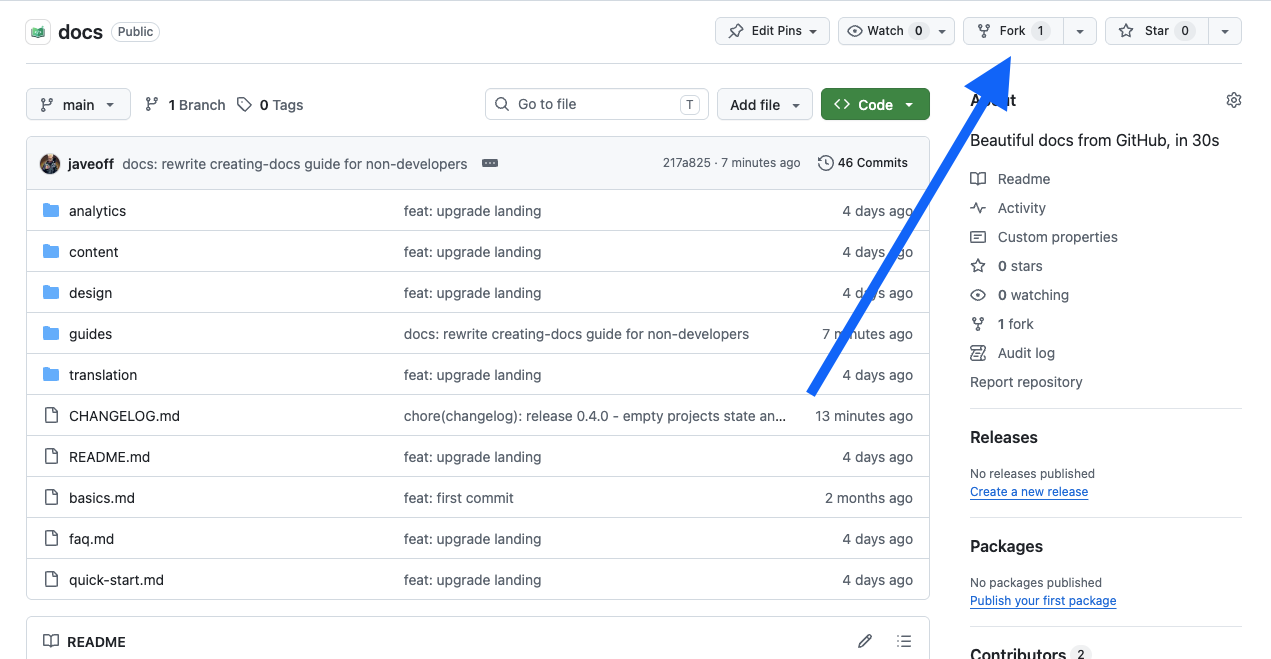
Go to github.com/docsbook-io/docs.
-
Click Fork in the top-right corner.
-
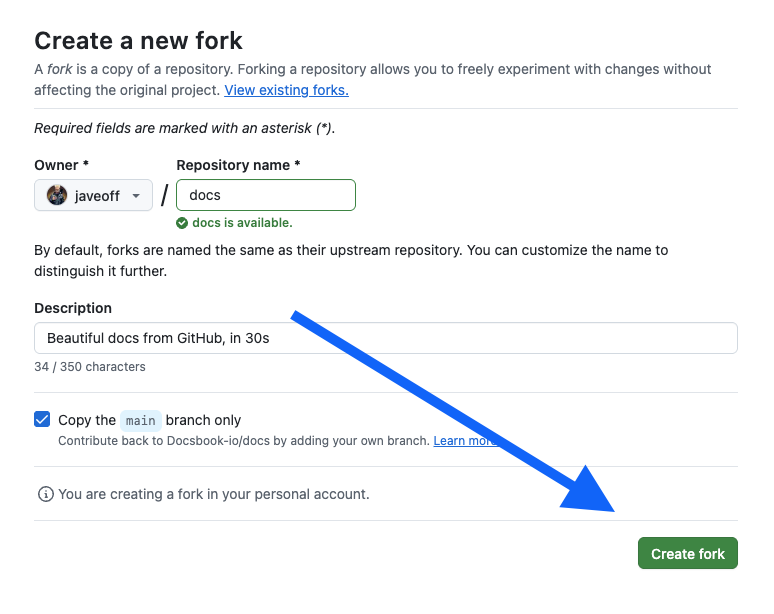
Leave every setting as it is and click Create fork.
-
GitHub opens your new repository at
github.com/YOUR-USERNAME/docs.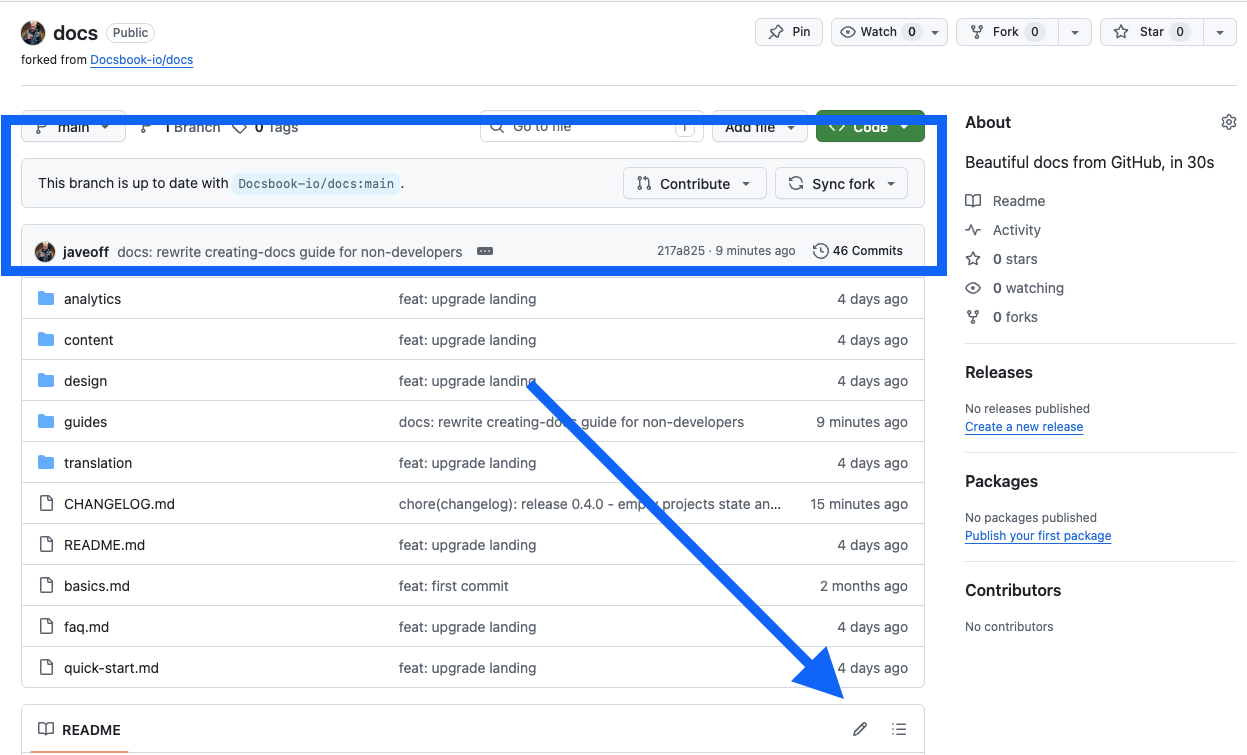
You now have a repository holding example documentation, ready to publish.
Step 3: connect the repository to Docsbook#
-
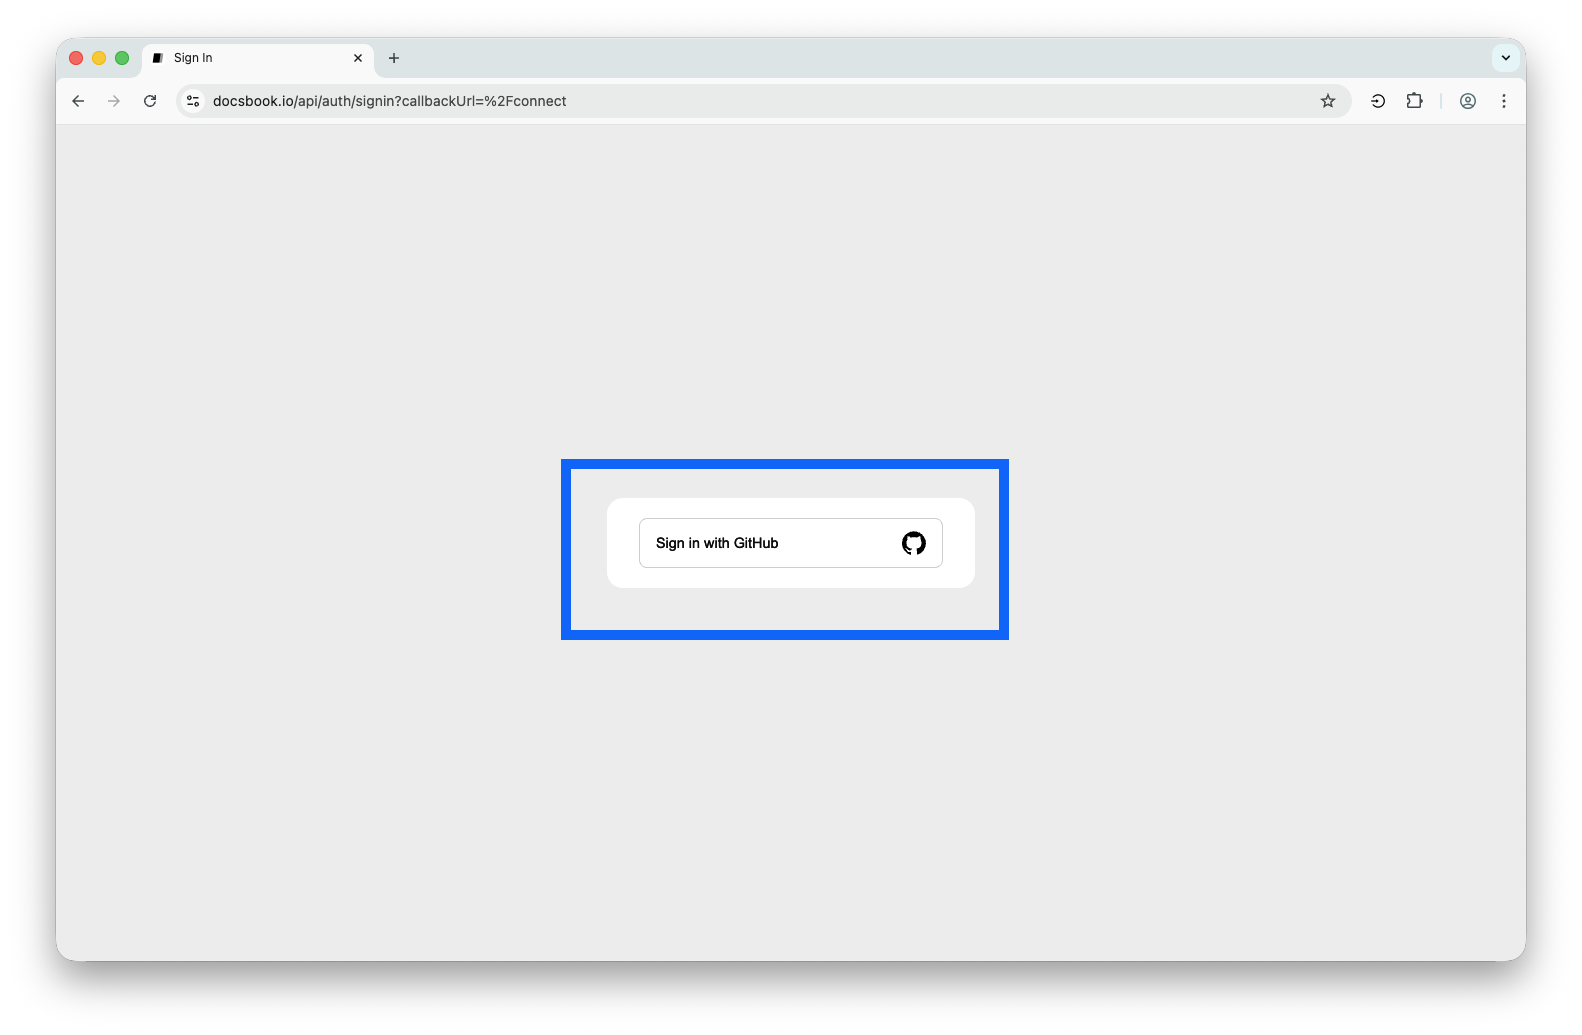
Go to docsbook.io/connect.
-
Choose a sign-in method — GitHub, Google, Apple, or a one-time code by email — and complete it.
-
If you signed in with Google, Apple or email, Docsbook asks for GitHub access. Click Authorize docsbook.
Docsbook reads your repository files. It cannot modify or delete anything in your repository unless you ask it to.
-
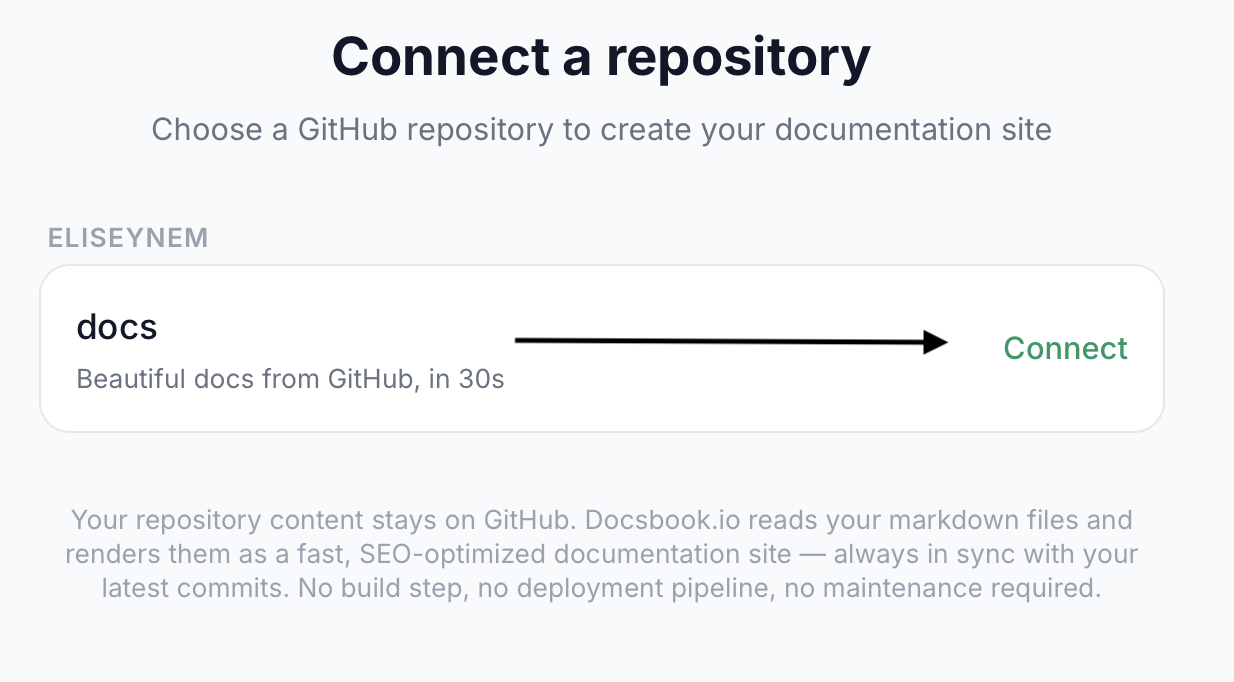
Find the repository you forked in the list and click it.
-
Docsbook builds your site and redirects you to it.
Your documentation is now live at:
docsbook.io/YOUR-GITHUB-USERNAME/docsOpen it and click through the sidebar. Every page you see is a markdown file in the repository you forked.
Step 4: edit a page on GitHub#
-
Open your repository at
github.com/YOUR-USERNAME/docs. -
Click the file you want to change — start with
README.md.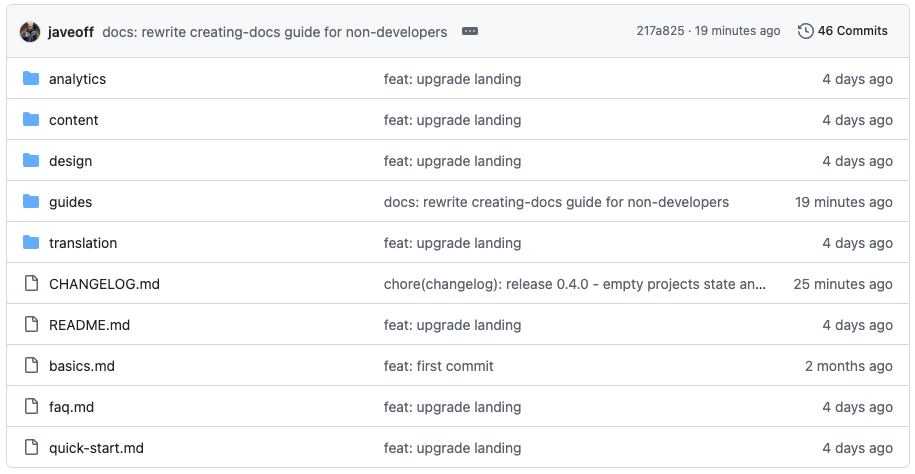
-
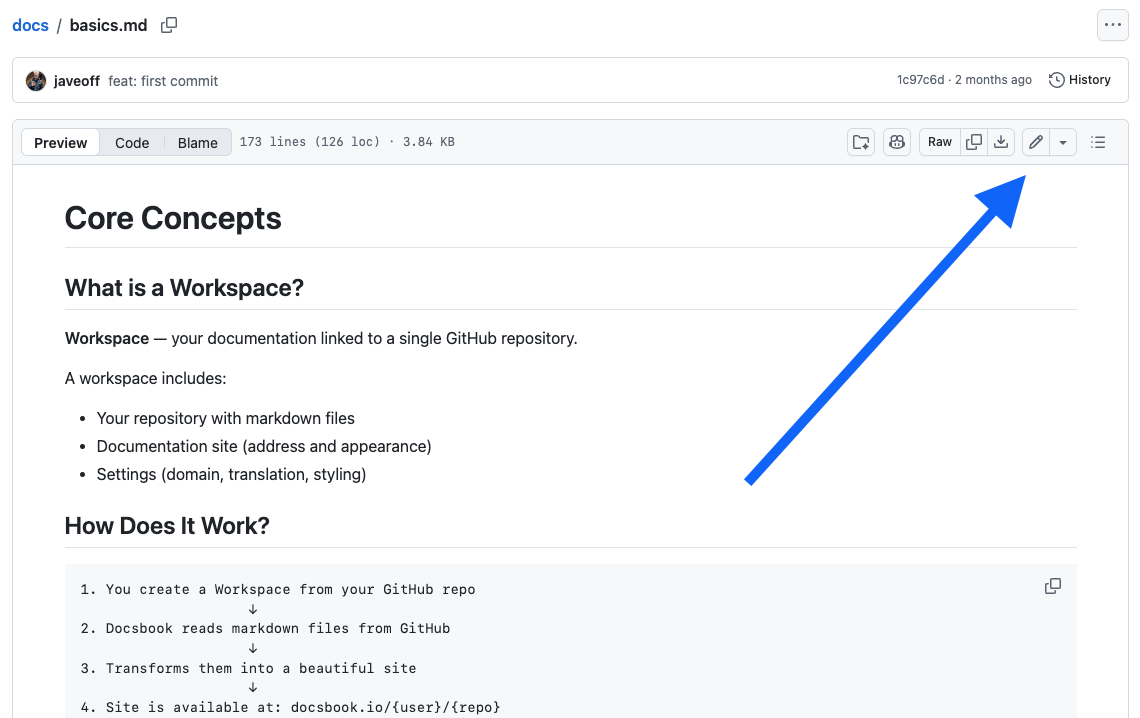
Click the pencil icon near the top right of the file.
-
Change a sentence. The file is written in Markdown:
**bold**renders as bold,# Headingrenders as a large heading. The markdown syntax reference at the end of this page covers the rest.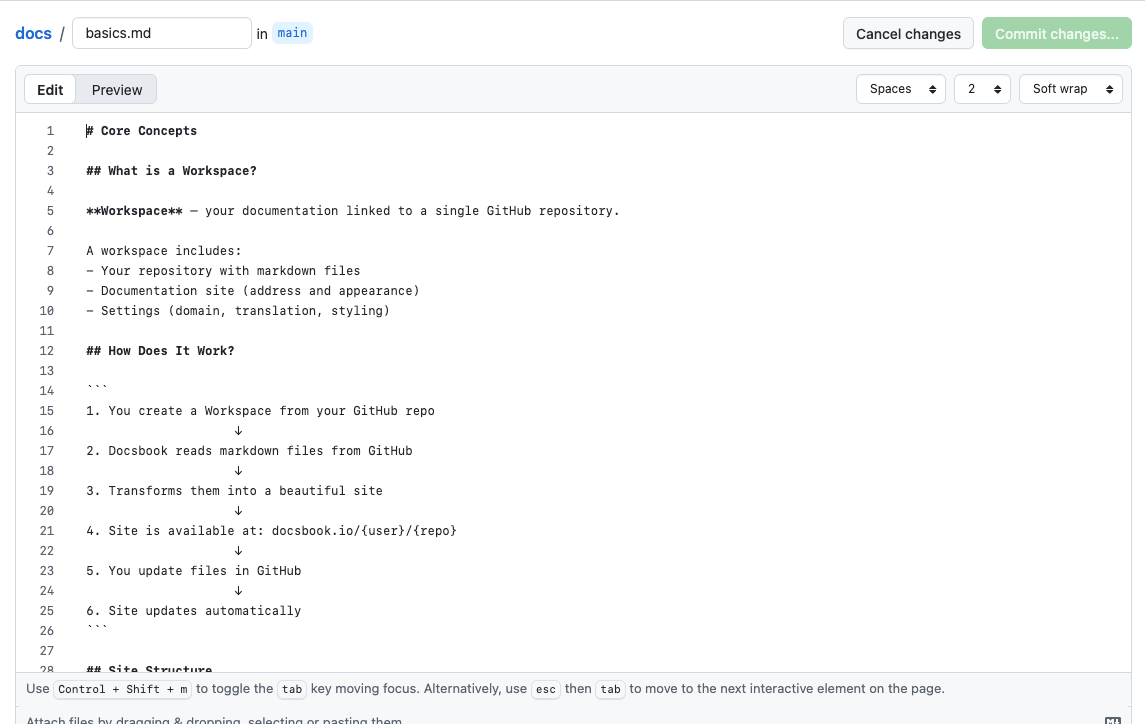
-
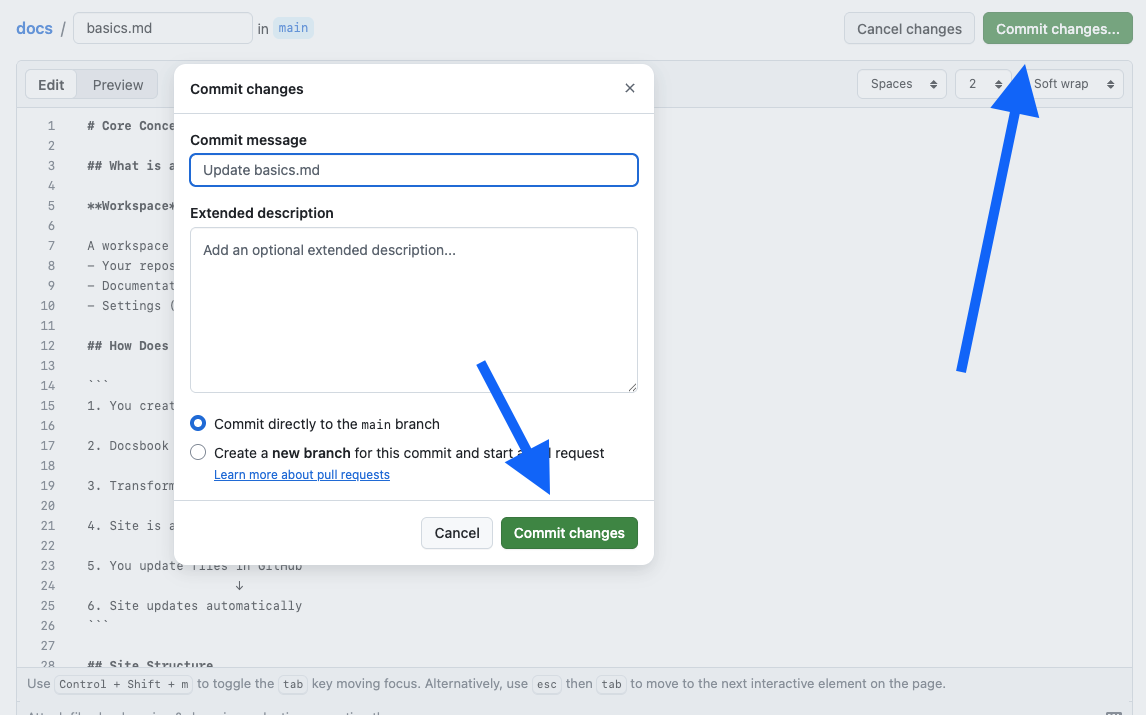
Scroll down to Commit changes.
-
Write a short note describing what you changed, such as "Update the introduction".
-
Click Commit changes.
Step 5: see the change on your site#
Go back to your Docsbook site and reload the page you edited. Your new sentence is there.
That is the whole loop: commit to GitHub, and the published site follows. You have finished the tutorial.
Add and delete pages#
Adding a page is the same loop with a different button.
Add a page:
-
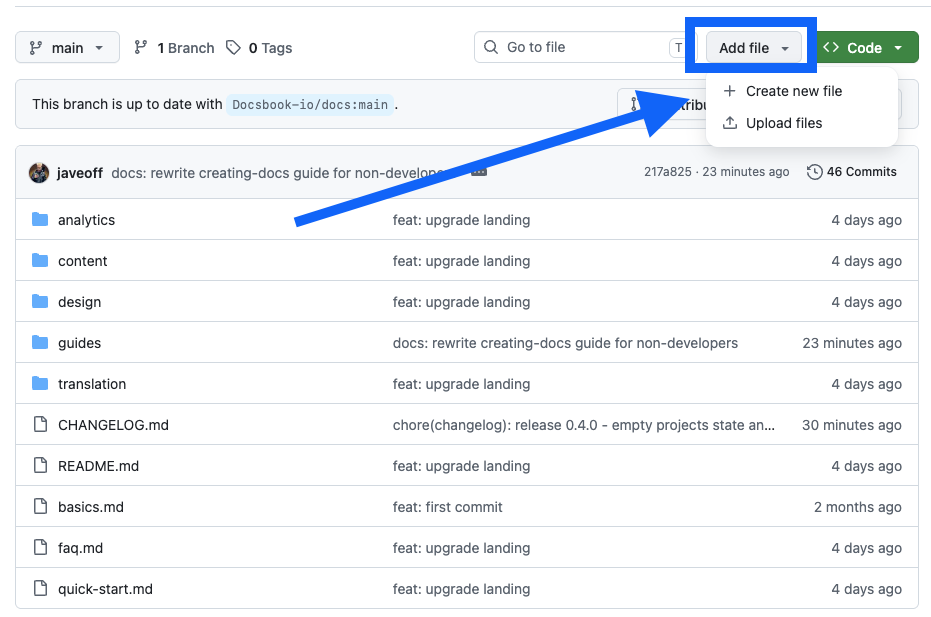
Open your repository and click Add file → Create new file.
-
In Name your file, type the path and filename, such as
guides/installation.md. Typing a/creates the folder.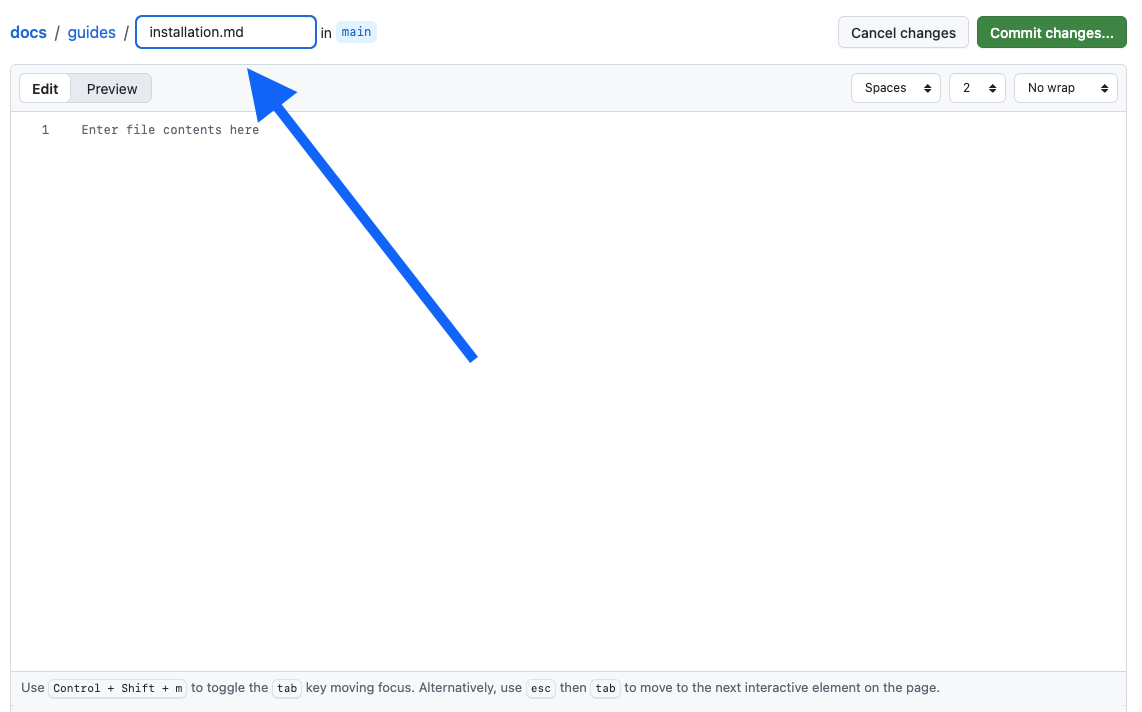
-
Write the content and click Commit new file.
The page appears in your Docsbook sidebar on its own.
Delete a page:
-
Open the file in your repository.
-
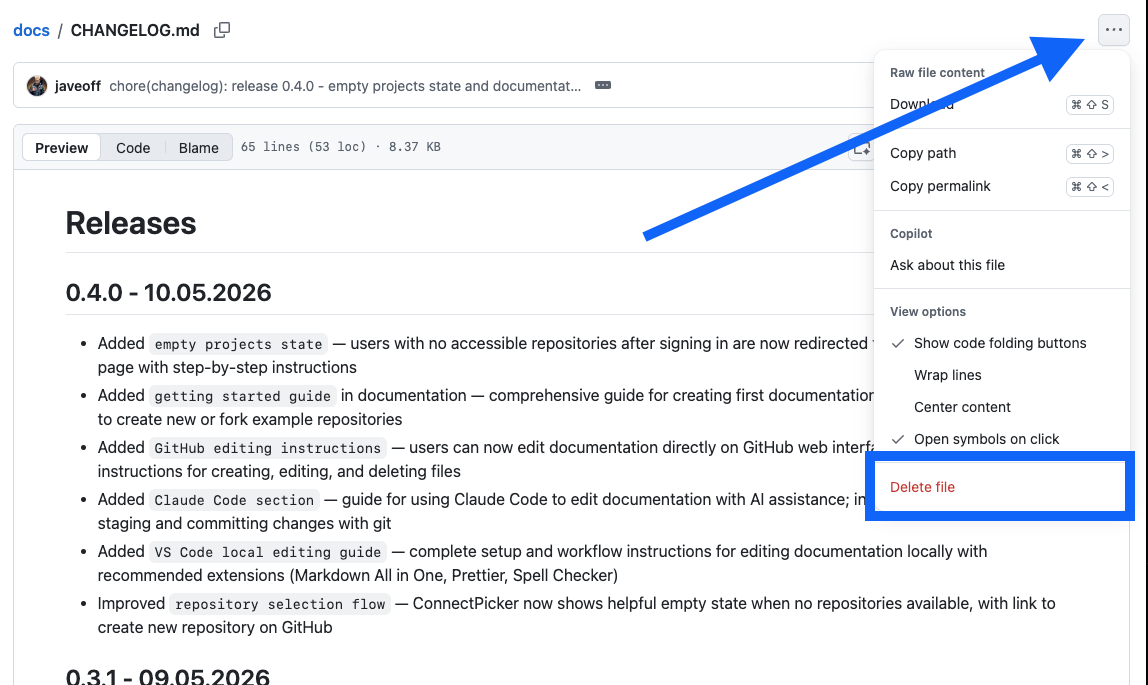
Click the ⋯ menu near the top right.
-
Click Delete file, then Commit changes.
Other ways to do this#
The tutorial above uses the path that works with nothing installed. Three alternatives exist once you are past the first site.
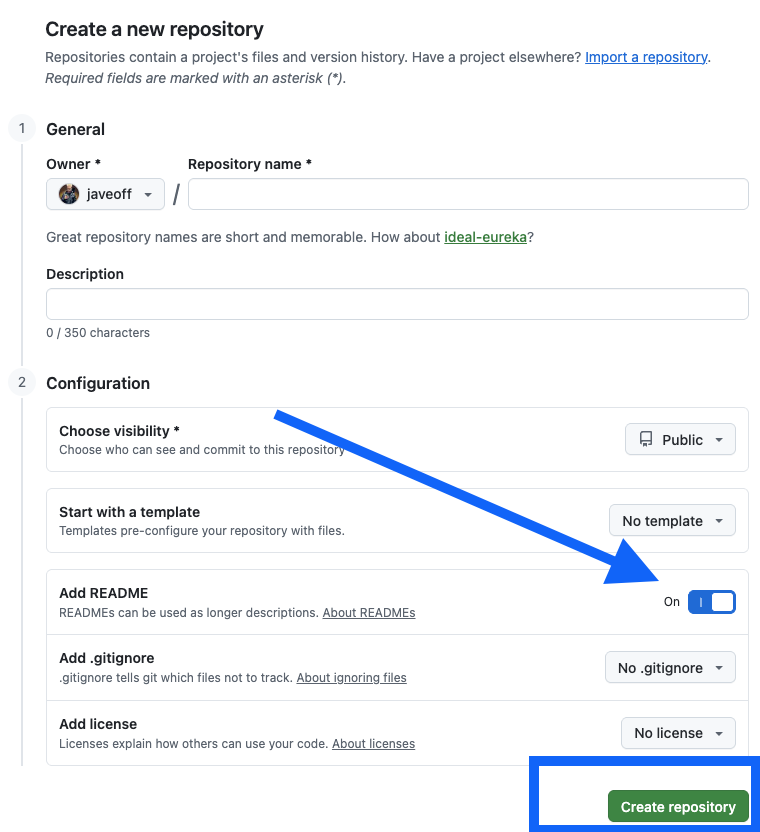
Start from an empty repository instead of forking. Go to github.com/new, give the repository a short name with no spaces, select Public, tick Add a README file, and click Create repository. Then connect it exactly as in step 3.
Write pages with an AI coding assistant. Claude Code reads, creates and edits files through conversation, which is faster when you are producing many pages at once. Install it from claude.ai/code, ask it to clone your repository, then describe what you want — "create guides/installation.md with sections for requirements, installation and first login". When you are done, tell it to commit and push, and your site updates.
Edit on the published page itself. Once your site is connected you can change a block from the page you are reading, inside the Docsbook AI chat, without GitHub and without an install. See editing on the live page.
Reference: markdown syntax#
Markdown is a set of symbols that control formatting. These are the ones documentation uses.
Text#
| What you type | What it renders as |
|---|---|
**bold text** |
bold text |
*italic text* |
italic text |
~~strikethrough~~ |
|
`inline code` |
inline code |
Headings, lists and links#
# Large heading (page title)
## Medium heading (section)
### Small heading (sub-section)

- First item
- Second item
  - Nested item, indented by two spaces

1. First step
2. Second step

[Link to an external site](https://example.com)
[Link to another page in your docs](/docs/guides/getting-started/managing-docs)
Images and code blocks#
Fence a code block with triple backticks and name the language, so it gets syntax highlighting:
```javascript
console.log("Hello!")
```Callouts#
> This is a note or an important callout.Reference: how your files become pages#
Docsbook builds the sidebar from your file and folder names. There is nothing to configure.
| File in your repository | Page in the sidebar |
|---|---|
README.md |
Home |
installation.md |
Installation |
guides/quick-start.md |
Guides → Quick Start |
api/overview.md |
Api → Overview |
Three rules follow from that:
- File and folder names become page titles, with hyphens replaced by spaces.
README.mdinside a folder becomes that folder's index page.- Lowercase names with hyphens produce readable URLs:
getting-started.mdbecomes/getting-started.
For what decides the order of those pages, see Manage your documentation site.
Next steps#
- Manage your documentation site — update content, control access, and fix a site that has not refreshed.
- Set up a custom domain — serve the docs from
docs.yourcompany.com. - Turn on full-text search — let readers find a page by keyword.